
By now, you’ve probably read our last blog post where we celebrated the tenth anniversary of Davos Codes at the World Economic Forum.
Following on from this, we thought we would delve behind the scenes to share some of the educational technology (EdTech) behind the showcase projects, as we think it’s pretty cool! Our tech favourites this year being:
-
-
- micro:bits (always a firm favourite!)
- AI Vision HuskyLens from DFRobot
- Makey Makey + Code-a-Key Backpack from JoyLabz
- Retro Arcade handheld game consoles from Elecfreaks
- Raspberry Pi Zero
- AnkerMake M5 3D Printer
-
🐿️ Project: AI Animal Identification
Key Tech:
|
Students learnt about AI by training a machine learning model on DFRobot’s HuskyLens. After training the HuskyLens with various images of each animal type, the Lens could successfully identify each animal. We then combined the HuskyLens with a micro:bit, allowing each HuskyLens to send radio messages, identifying the animal viewed to an additional micro:bit, which was connected to a MakeyMakey Code-a-Key backpack. The backpack allows the micro:bit to perform keypresses on the connected computer, which can be used in various ways. We chose to display specific information about each animal when viewed with the HuskyLens’s camera.
Here's a diagram showing how it all works together:
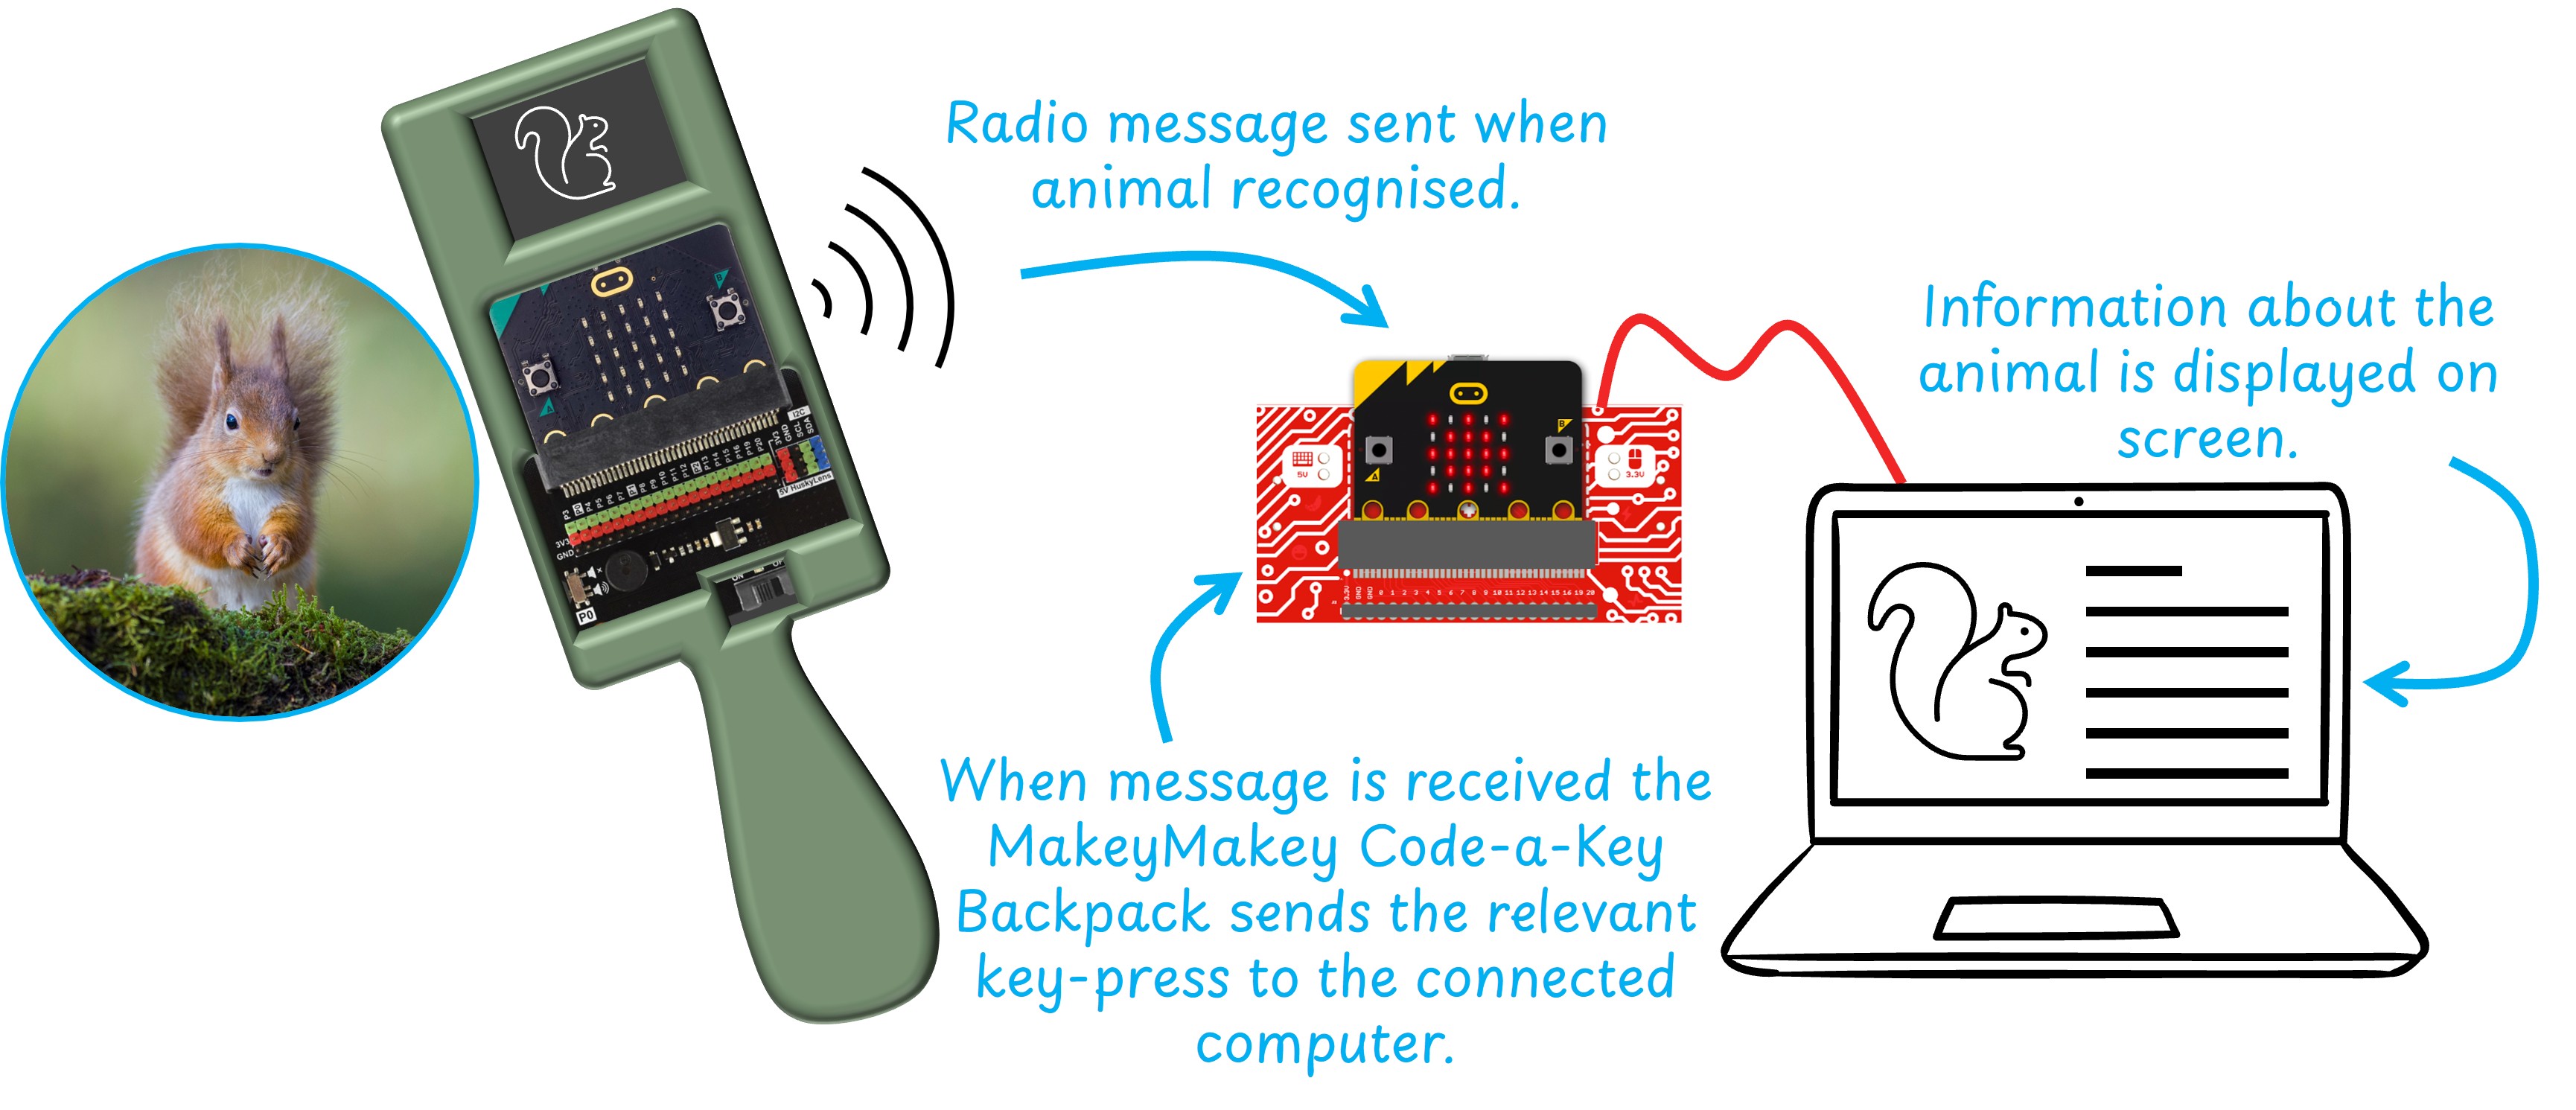
Students researched the animals of Davos and developed their infographics for display. At the showcase event, animal images were displayed on a spinning wheel, while the HuskyLens and associated tech were housed in a 3D-printed handheld device.
⭐ Project: “Wishing on a Star” Wishing Wall
Key Tech:
|
Using P5JS, students programmed a webcam to capture images of paper-based stars, which were then digitised and displayed on a large screen, creating a collection of wishing stars set amongst the universe. Visitors to the event could write their SDG wishes for the future on stars, then push a button to capture an image of their wish and send it like a shooting star to join other star-shaped wishes on a large screen at the showcase event.
To enable image capture, we connected a large button to a MakeyMakey, which triggered a mouse-click in the P5JS code that captured the image, translated it into a star shape, and then displayed the image on the screen at a random position.
🕹️ Project: Environmental Arcade Games
Key Tech:
|
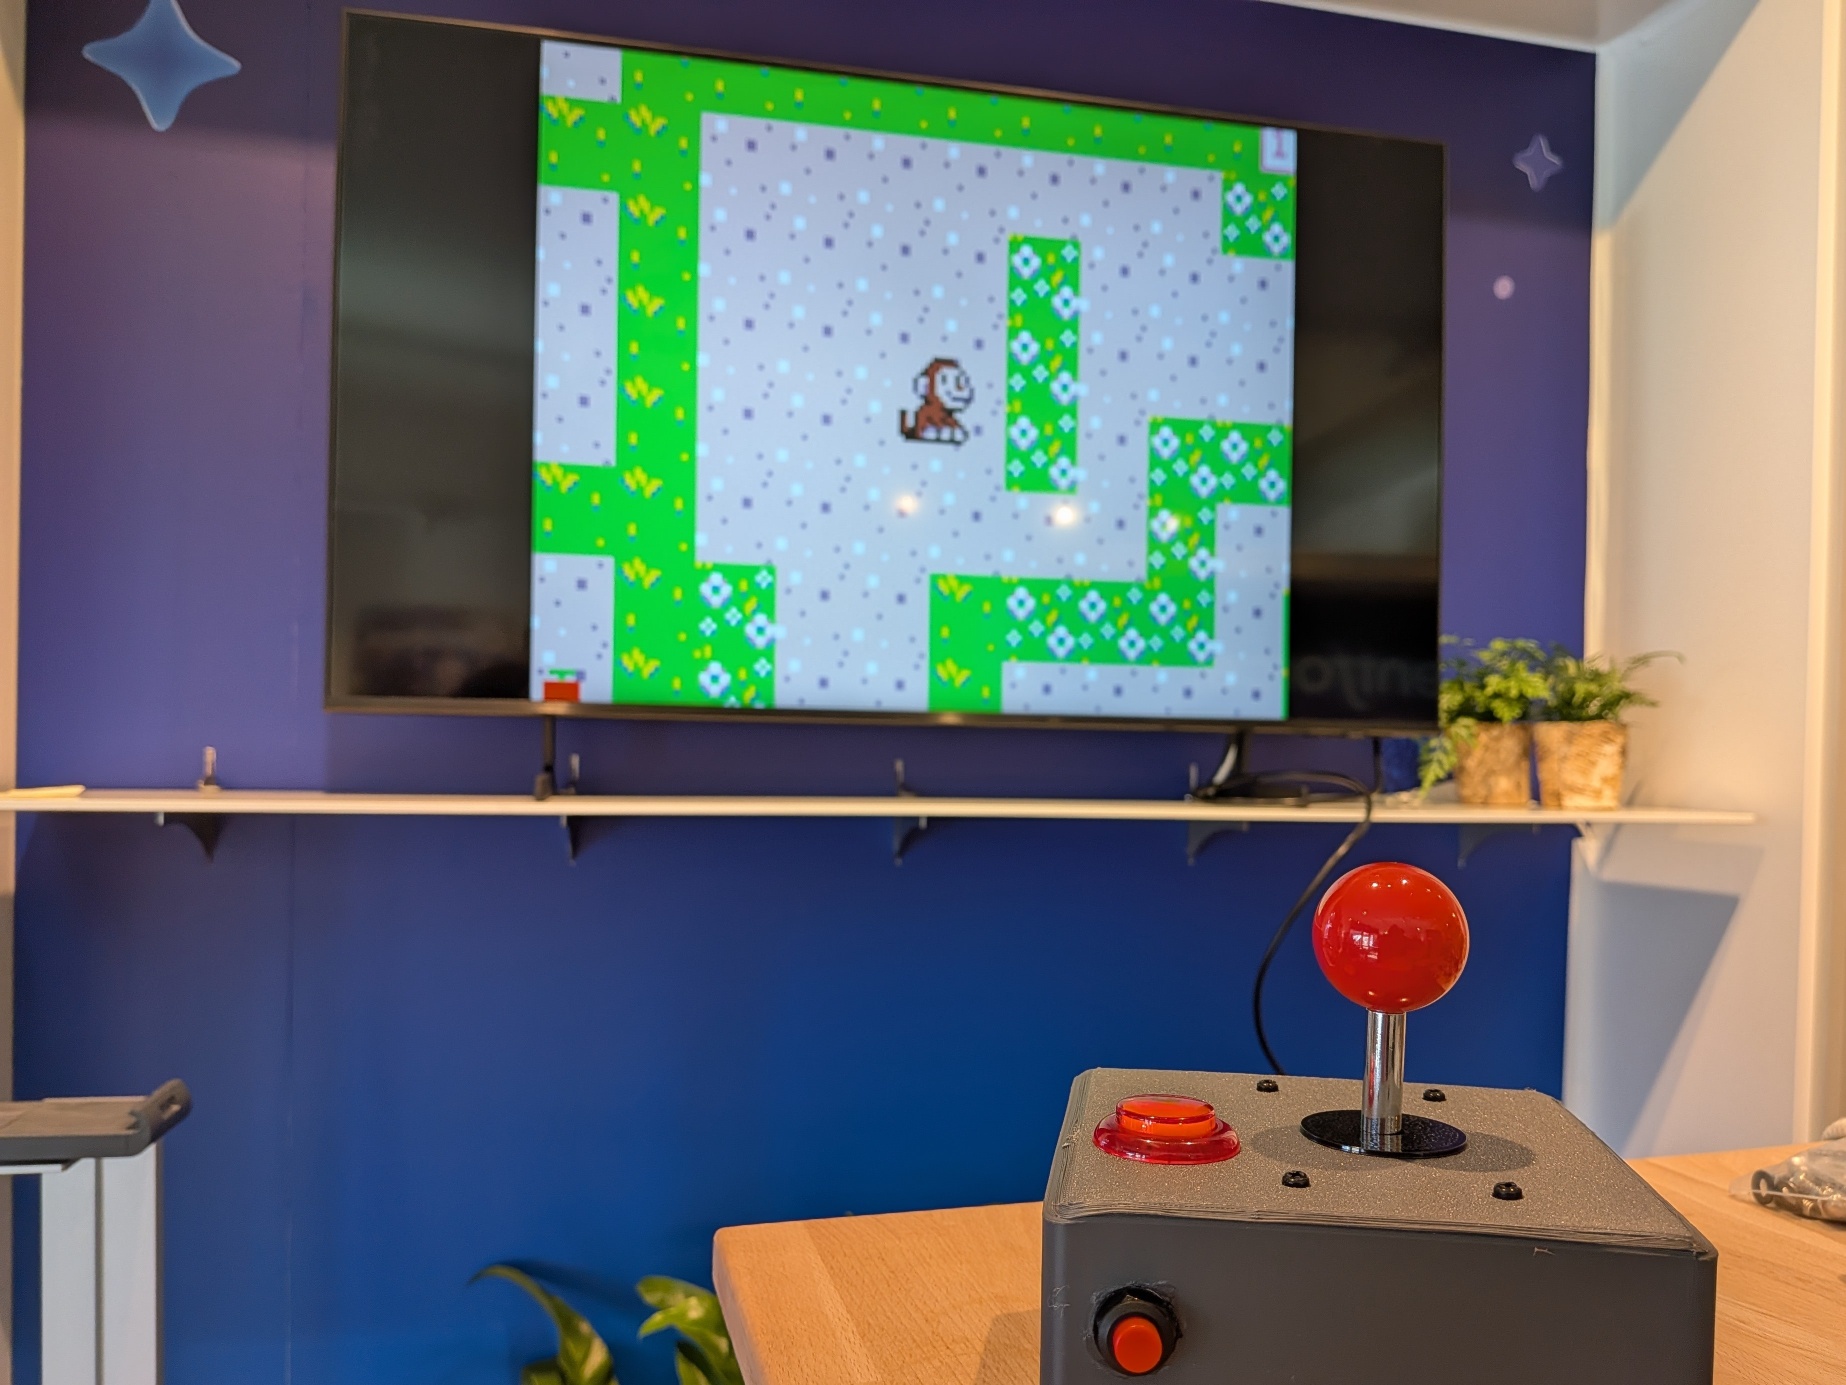
Students used MakeCode Arcade to build a game in which the player collects all the litter within a set time limit. This involved designing and programming their games in the months leading up to the showcase event.
 The games were showcased in two different ways.
-
-
- Retro Arcade handheld game consoles were used so visitors could play selected individual games. These controllers include both the screen and the controls, making for a fun individual playing experience.
- We used a Raspberry Pi Zero to build a joystick that we connected to a large screen. This effectively turns the joystick into an arcade cabinet that contains all of the students' games, allowing players to select games from a menu and then play them! MakeCode Arcade provides instructions on how to set up a Raspberry Pi Zero in this way.
-
🎲 Project: Environmental Board Games
Key Tech:
|
Students began by comparative testing a range of existing board games. This involved a play-test-review-extend process on multiple games, where students were encouraged to consider improvements and how technology could be included. Next, student teams were challenged to design their own board games with a twist; they must include technology in some way. Students had a range of ideas for tech inclusion, such as, electronic dice, LED strips to show progress, automated spinners, buzzers and a variety of interactive experiences! All the programming and electronic parts were programmed and controlled using micro:bits, most were connected to Ring:bits, this allowed them to be battery-powered in a compact way, while others were connected to Sensor:bits or IoT:bits allowing continuous power and more connection points.
Many teams also opted to add 3D elements to their games, using TinkerCad to design game elements, such as playing pieces, micro:bit holders and obstacles. Items were then 3D printed using the school’s AnkerMake M5 3D printer, purchased as part of the Salesforce-funded Davos Codes programme in a previous year.
If these projects sound exciting and you would like us to deliver these or something similar at your school or institution, we can offer projects as standalone workshops. Click here to book a workshop or drop us an email to discuss further!